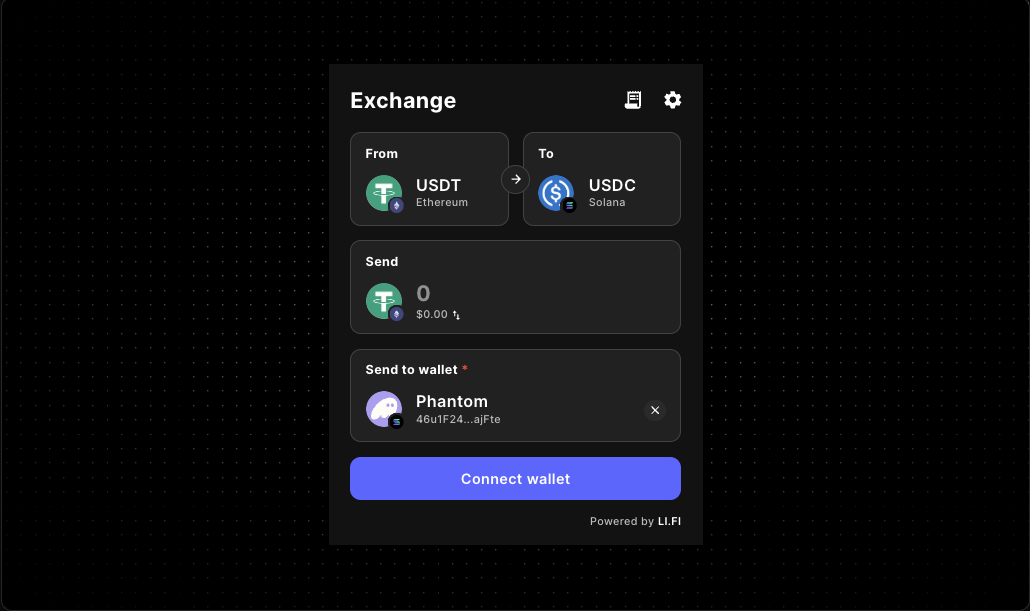
LI.FI Widget Checkout Routing Guide
Plan a LI.FI widget checkout flow with the right route scope, layout, wallet timing, and configuration order before deeper implementation work begins.
A LI.FI widget can do more than render a swap or bridge surface. In a checkout flow, it becomes part of the product decision path: where users land, how much route choice they see, when wallet connection appears, and what happens after the transfer completes.
If you want the broader evaluation path first, continue with the LI.FI Playground Guide. If you are ready for deeper setup details after checkout decisions are clear, move next to the LI.FI Widget integration guide or the LI.FI Widget Embed Guide.
Who this guide helps
- frontend engineers evaluating widget-based checkout, funding, or onboarding flows
- product and engineering teams deciding how much route freedom a LI.FI widget should expose
- builders comparing wallet timing, route scope, and post-transfer handoff before implementation hardens those choices
When a LI.FI widget checkout flow makes sense
A checkout-style LI.FI widget flow is usually the right fit when asset movement is part of a larger job, not a separate destination.
- onboarding that requires funding on a specific chain before users can continue
- deposit or treasury flows where the product expects a narrower route than a public swap page
- dashboards that need an embedded bridge or swap step inside an existing app shell
- wallet-aware flows where the transfer should feel like one stage of checkout instead of a separate research task
In these cases, the core UX question is not only how to mount the widget. It is how much freedom the route should expose before users lose sight of what the product is asking them to do.
What checkout routing changes compared with a broad LI.FI playground
A broad LI.FI playground is useful for exploration. Checkout routing is about control.
- whether the widget is a full destination, an embedded panel, or one step in onboarding
- whether chains and tokens should stay broad or reflect a narrower product path
- whether wallet connection should happen before the widget opens or inside the route itself
- whether the page explains what the transfer unlocks after completion
- whether the widget configuration matches support expectations for version one
The checkout questions to answer early
Is the widget the destination or a step?
A dedicated route usually benefits from more context and more room. An onboarding or dashboard step usually benefits from fewer choices and tighter scope.
How broad should the route be?
Some products benefit from wide route exploration. Others need a narrower checkout path that keeps users aligned with one destination chain, one expected asset path, or one operational next step.
When should wallet connection happen?
App-level connection can feel smoother in a wallet-aware product shell, while widget-first connection can work well on a dedicated checkout surface where the task is obvious.
What happens after completion?
A checkout flow needs a visible next step so users understand whether the transfer unlocks onboarding, funds an account, prepares a balance, or moves them into another product action.
Core LI.FI widget controls that matter for checkout routing
The existing Gizmolab LI.FI docs already point to the controls that matter most when a route moves from exploration into checkout design.
allowedChains
Use allowedChains when the checkout should support only the chains that match the surrounding product flow.
allowedTokens
Use allowedTokens when token choice should reflect the asset path that matters after checkout rather than broad exploration.
transactionSettings
Use transactionSettings when the route should feel more guided than exploratory and transfer behavior needs to match the rest of the checkout UX.
variant, subvariant, and appearance
Use layout controls to decide whether the widget belongs in a wide destination page, a compact embedded panel, or another guided route shape.
theme
Use theme after the base route is stable so visual polish does not hide route-scope issues or wallet-state confusion.
walletManagement
Review wallet management after the route model is clear, especially when the flow starts disconnected or includes guided onboarding.
fee and feeConfig
Review monetization logic after route clarity, disclosure expectations, and support responsibilities are understood.
WidgetConfig
Use a shared WidgetConfig object when several pages or checkout surfaces should inherit the same LI.FI widget baseline.
A practical implementation sequence
1. Install the widget package
2. Start with a minimal render
Render the smallest possible widget in the same page container where the checkout flow is expected to live. That first pass answers the only question that matters at this stage: does the widget render cleanly in the intended route and container?
3. Add route constraints in order
- minimal render with integrator
- layout choices with variant, subvariant, and appearance
- chain restrictions with allowedChains
- token restrictions with allowedTokens
- transaction behavior with transactionSettings
- theme alignment with theme
- wallet behavior with walletManagement
- fee logic with fee or feeConfig
4. Move into shared config when the route is stable
Once the checkout behavior feels right, centralize the widget defaults in a shared config.
Implementation workflow checkpoints
1. Start with a minimal render
Install the package and render the smallest possible widget in the same page container where the checkout flow is expected to live.
2. Test the route in the real page shell
Evaluate page width, surrounding nav, drawer or modal constraints, spacing, scroll behavior, and any existing wallet provider context before tightening configuration.
3. Compare broad and narrow versions
Run at least one pass with broader routing freedom, then compare it with a scoped version so you can see whether restrictions improve clarity or just hide unresolved UX questions.
4. Add route constraints one layer at a time
Keep routing decisions separate from visual decisions and business logic by layering layout, chain restrictions, token restrictions, transaction behavior, theme, wallet behavior, and fee logic in order.
5. Move into shared config when the route is stable
Once the checkout behavior feels right, centralize widget defaults in a shared config so multiple checkout surfaces inherit the same baseline.
Checkout layout patterns that usually work well
Dedicated checkout route
Why it works
- users understand the purpose quickly
- the widget has room for routing context
- supporting copy can explain what the transfer unlocks next
Watch for
- adding too many choices before the route model is proven
- treating the page like a generic component demo
- adding fees or extra business logic before route clarity exists
Embedded dashboard or treasury step
Why it works
- users stay inside the interface they already trust
- route scope can reflect product policy more closely
- the widget supports a concrete task rather than a separate exploration session
Watch for
- layouts that feel too cramped for a high-stakes transfer
- unclear visual hierarchy between the widget and surrounding controls
- hidden assumptions about the wallet state inherited from the app shell
Guided onboarding checkout
Why it works
- the route can stay narrow and intentional
- the next step is easier to explain
- support expectations stay closer to the actual product promise
Watch for
- broad token or chain choices that conflict with the onboarding path
- vague completion states after the transfer finishes
- wallet prompts that appear later than the user expects
Wallet timing is part of routing, not a separate concern
Teams often treat wallet connection as a later implementation detail. In checkout routing, it changes the flow from the first interaction.
App-level wallet connection
Best when the product already has wallet-aware navigation and the widget is one surface inside a broader session.
Widget-first connection
Best when the route is dedicated and the asset-movement intent is obvious.
Guided onboarding connection
Best when the transfer is one step inside a structured path and the route should stay narrow.
For wallet-specific planning, continue with the LI.FI Widget Wallet Connect Guide and the LI.FI Widget Supported Wallets and Routing Guide.
Common mistakes in LI.FI checkout routing
Testing too many variables at once
When layout, chain restrictions, tokens, wallet behavior, theme, and fee logic all change together, it becomes much harder to understand what caused the result you are seeing.
Treating a checkout route like a generic playground
A playground is useful for learning, but a checkout flow needs a narrower product promise. If the route behaves like open exploration while the product expects a guided funding path, users will feel the mismatch quickly.
Keeping the route broader than support expectations
If the product can only explain or support a smaller set of chains, tokens, or next steps, the route should usually mirror that reality.
Hiding the post-transfer step
Users should not finish a route and then wonder whether they funded an account, completed onboarding, or unlocked the next action.
Solving visual polish before route clarity
A beautifully themed widget can still create a confusing checkout experience if the route scope and wallet timing are unresolved.
A production-minded checkout checklist
- the widget works in the real page container
- the route is intentionally broad or intentionally narrow
- chain restrictions reflect actual product support
- token restrictions reflect the next step in the user journey
- wallet connection timing matches the surrounding app flow
- supporting copy explains what users are doing and why
- the completion state leads to a clear next action
- fee logic, if used, is reviewed separately from the base route
- adjacent docs send builders to the right next implementation step
Where to continue in the LI.FI docs flow
- LI.FI Widget component reference for the live component surface and core props
- LI.FI Widget integration guide for the broader React and Next.js setup path
- LI.FI Playground Guide for wider evaluation and incremental testing
- LI.FI Widget Playground Routing Guide for route-shaping comparisons in a playground context
- LI.FI Widget Embed Guide for practical embedding in React or Next.js
- LI.FI Widget Error Handling Guide for route, wallet, and execution recovery states
- LI.FI Widget Embedded Wallet Routing Guide for embedded-wallet-specific route decisions
- LI.FI Widget Embedded Wallet Onboarding for guided onboarding flows
- Docs introduction if you need the broader docs orientation
FAQ
What is a LI.FI widget checkout routing guide?
A LI.FI widget checkout routing guide helps builders decide how the widget should behave inside a checkout, onboarding, funding, or embedded transfer flow. It focuses on route scope, layout fit, wallet timing, and practical configuration order.
Is this different from a LI.FI playground guide?
Yes. A LI.FI playground is broader and better for exploration. A checkout routing guide is narrower and focuses on shaping a product-ready route instead of only testing whether the widget renders.
When should the route stay broad?
Keep the route broad when the widget is the main destination and users genuinely benefit from wider exploration across chains or assets.
When should the route be narrower?
Narrow the route when the widget supports onboarding, deposits, treasury actions, or another flow where too many choices would create friction or increase support burden.
Should wallet connection happen before the widget loads?
It depends on the product shell. App-level connection often works best when the rest of the app is already wallet-aware. Widget-first connection often works best on a dedicated checkout route where asset movement is the main task.
Should route constraints be configured before layout testing?
Usually not. Start with a simple render in the real container, then add route constraints after the base interaction is stable.
Does this replace the LI.FI widget docs?
No. This guide is the decision layer for checkout routing. Use it with the LI.FI widget docs, embed guide, wallet connect guide, and playground guides as implementation work gets more specific.
Continue from checkout routing to implementation
A LI.FI widget checkout flow works best when the route feels intentional from the first interaction: the layout matches the job of the page, the route scope matches the product promise, and wallet timing does not surprise the user.
- Continue with the LI.FI Widget integration guide
- Review the LI.FI Widget Embed Guide
- Use the LI.FI Widget Error Handling Guide before launch if the route needs clearer recovery states
"One of the only full-stack Web3 component libraries i've seen in the space so far. Ten out of ten recommended. Saved me a ton of time. Can't wait to see what templates they release next."
Samy
Side projects builder