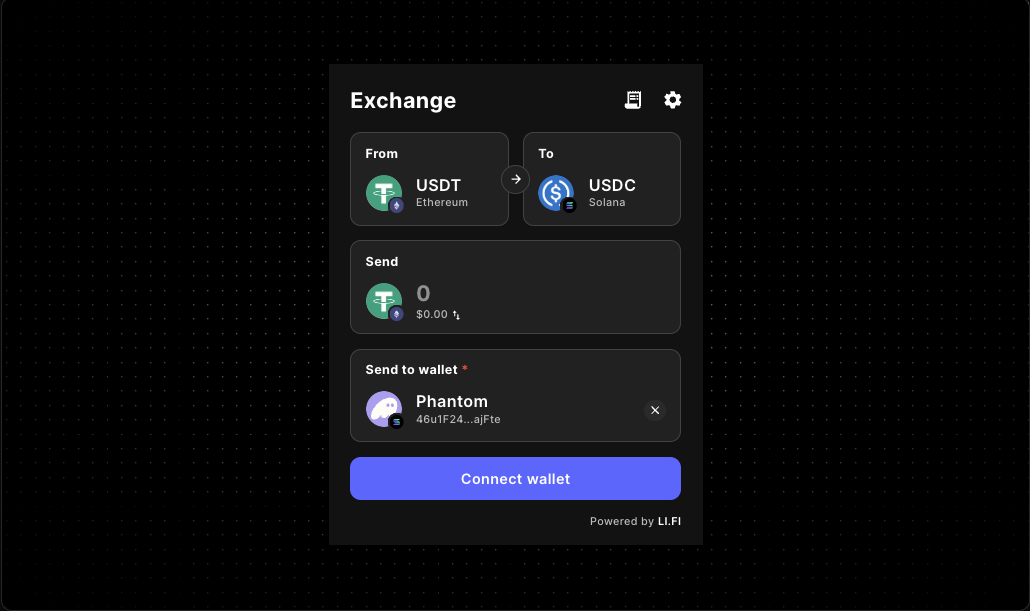
LiFi Widget Wallet Connect Guide
Plan wallet connection and onboarding around the Gizmolab LiFi Widget so a cross-chain swap or bridge flow feels product-ready instead of bolted on.
Wallet connection is where a cross-chain widget either feels ready for production or starts creating friction. The Gizmolab LiFi Widget helps teams embed swap and bridge flows inside the app, but the onboarding experience still depends on how clearly wallet connection is planned around the widget.
Use this guide to decide where the wallet step belongs, how to keep the first interaction clean, when to narrow route scope, and how to move from a basic embed into a production-ready wallet onboarding flow.
Good fit for this guide
- embedded swap or bridge flows inside an app surface
- onboarding steps that require wallet-based asset movement
- dashboards or treasury tools that need a built-in transfer action
- product teams refining wallet connect UX before launch
Why wallet connect deserves its own implementation pass
A widget can be technically embedded and still feel incomplete if the wallet step is unclear. In practice, most friction shows up before the first route is ever selected.
- Users do not know whether to connect before opening the widget.
- The widget sits inside a drawer, modal, or narrow panel that makes the first interaction harder.
- The app exposes too many chain or token choices for the actual product use case.
- Wallet state is handled in one part of the app and assumed somewhere else.
- Fee logic, branding changes, and wallet handling are all introduced at once.
For builders, the problem is not only rendering the LiFi Widget. It is making the wallet onboarding path feel intentional.
A cleaner approach is to decide early whether the widget is a destination page, a step inside a broader flow, or a supporting utility panel where users are already connected before they arrive.
What the LiFi Widget contributes to wallet-aware flows
The Gizmolab LiFi Widget wraps @lifi/widget into a reusable component for embedded cross-chain swaps and bridging. That makes it useful for teams that want to keep asset movement inside the product instead of sending users to another destination.
integrator
Identify the application context tied to the widget integration.
variant / subvariant
Match the widget layout to the page surface where users will interact with it.
appearance / theme
Keep the widget visually aligned with the surrounding product UI.
allowedChains / allowedTokens
Narrow route scope when your product only supports a limited flow.
transactionSettings
Apply tighter product defaults when the route should feel more opinionated.
walletManagement
Shape wallet behavior when the integration needs more than the base embed.
fee / feeConfig
Add monetization only after disclosure and support expectations are understood.
WidgetConfig
Centralize shared settings when multiple routes inherit the same widget baseline.
The widget helps with the transfer interface, but your app still needs to answer a few product-level questions: should the wallet be connected before the widget is shown, should onboarding push users into one approved chain path, and does the page need a global wallet connection layer outside the widget?
Recommended wallet connect patterns for LiFi Widget embeds
App-level wallet connect before the widget loads
Best for
- dashboards
- treasury tools
- trading surfaces
- apps with existing wallet state in the shell
Why it works
- Users connect once and stay in one consistent app state.
- Other wallet-aware components can rely on the same provider stack.
- The widget becomes part of the product flow instead of a separate interaction island.
What to watch
- Confirm the route that hosts the widget reads the same wallet state as the rest of the app.
- Test chain switching and reconnect behavior in the actual page container.
- Avoid assuming a connected wallet if users can deep-link directly into the widget page.
Widget-first connection on a dedicated swap page
Best for
- dedicated swap or bridge routes
- component-led evaluation
- MVP rollouts where the widget is the main task
Why it works
- The page context makes the next action obvious.
- Users understand that connecting a wallet is required for the task.
- The widget can use a wider layout and more explicit surrounding guidance.
What to watch
- Do not overload the page with too many route choices on version one.
- Keep the pre-connect copy simple and task-oriented.
- Validate the disconnected state, loading state, and small-screen layout.
Guided onboarding with a narrow widget scope
Best for
- first deposit flows
- chain migration steps
- feature unlock paths that require asset movement first
Why it works
- You can narrow the experience to the chains or tokens that matter.
- The widget acts as a controlled operational step instead of a broad exploration tool.
- Users are less likely to branch into unrelated routes.
What to watch
- Keep chain and token restrictions aligned with the exact product promise.
- Make the next step after the transfer explicit.
- Avoid a general-purpose widget configuration if the flow is tightly scoped.
A practical implementation workflow
1. Prove the base embed works in a real client-rendered page
Install the package and mount the widget in the exact page, panel, or drawer where users will use it.
2. Decide where the wallet step belongs
Once the base embed works, define whether the wallet is connected before the widget appears, during the first interaction, or as part of a guided onboarding sequence with limited choices.
3. Align the widget surface with the job of the page
For a destination page, a wider or more prominent layout usually makes sense. For a side panel or onboarding step, a narrower configuration can reduce cognitive load.
Use route restrictions only when product rules justify them. A narrower setup is usually easier to support than a fully open experience.
4. Introduce app-level wallet state after the base flow is stable
If your app already uses a wallet stack, connect the page to that provider layer after the widget render is verified.
- Render the widget in isolation.
- Validate layout and interaction states.
- Connect the page to the existing wallet provider stack.
- Test reconnect, refresh, and deep-link entry states.
- Only then add scope controls, fee logic, or more advanced wallet behavior.
5. Centralize widget configuration if more than one route uses it
If the widget appears in several places, move shared settings into one config object so wallet-related defaults stay consistent.
How to design the first wallet interaction
Clear page intent
Users should understand whether they are here to swap, bridge, deposit, or complete an onboarding step.
Minimal decision load
If the page only supports a narrow route or asset set, configure it that way. Broader choice is not always better.
Stable visual context
Wallet connection, widget rendering, and the surrounding UI should feel like one flow.
Predictable next step
After connection, users should know whether they are expected to pick a route, confirm an amount, or continue to another product step.
When these traits are missing, teams often mistake a UX problem for a widget problem.
Common wallet connect mistakes in LiFi Widget implementations
Treating wallet connect as separate from widget integration
If the widget is one of the main transaction surfaces, wallet connection belongs in the same implementation review instead of being left for later.
Testing only in a blank page
A widget that looks fine in isolation can behave differently inside tabs, drawers, or dense dashboards.
Leaving the widget too broad for the use case
If the product only supports a limited route, set that expectation in the widget. Narrowing scope usually improves onboarding clarity.
Adding fee logic before the flow is stable
Review disclosure and support expectations after the base route works reliably rather than mixing monetization decisions into the first implementation pass.
Assuming one wallet state covers every entry path
Users may arrive through deep links, refreshed pages, or expired sessions. Test disconnected and reconnect states explicitly.
Operational checklist for production review
Integration checks
- Install @lifi/widget.
- Mount the widget in a client-rendered surface.
- Pass an integrator value.
- Verify the page works in the exact production container.
- Compare compact and wide layouts against the real task.
Wallet flow checks
- Decide whether the wallet is connected before or during widget interaction.
- Test fresh session, reconnect, and refresh states.
- Confirm the page handles direct entry without hidden assumptions.
- Make the post-connect next step explicit.
Scope and UX checks
- Restrict chains only if the product requires it.
- Restrict tokens only if the product requires it.
- Validate copy for onboarding, errors, and disconnected states.
- Keep the first version narrower if support burden is still unknown.
Monetization and policy checks
- Review fee or feeConfig separately from the base embed.
- Confirm any product-level route restrictions before publishing them.
- Add chain, token, or fee specifics only after product review is complete.
Why this guide belongs in the current docs cluster
The strongest current demand signal in the existing docs cluster is still the LiFi Widget topic. A wallet-connect guide extends that interest into a more implementation-ready surface instead of repeating a generic overview.
- the component page covers discovery
- the integration page covers setup
- the playground page supports evaluation
- the wallet connect guide closes the gap between embedding the widget and making onboarding feel launch-ready
FAQ
Do I need a separate wallet connect flow for the LiFi Widget?+
Not always. If your app already has a wallet-aware provider stack, it is usually better to place the LiFi Widget inside that existing flow rather than creating a separate connection pattern.
Should users connect their wallet before opening the widget?+
It depends on the page. A dedicated swap page can support widget-first interaction, while a dashboard or treasury app usually benefits from app-level wallet connection before users reach the widget.
Can I narrow the widget to selected chains or tokens?+
Yes. The existing docs and examples expose allowedChains and allowedTokens as practical scope controls. Use them when the product supports a narrower route set.
When should I use walletManagement?+
Use it when the integration needs more opinionated wallet behavior than the base embed. Review the exact implementation against your approved wallet stack before publishing provider-specific instructions.
Should I add fees in the first version?+
Usually not. Many teams are better served by validating layout, connection flow, and route clarity first. Add fee or feeConfig only after disclosure and support expectations are understood.
Is this guide different from the LiFi Widget integration page?+
Yes. The integration page is the broader setup reference. This guide focuses on the wallet connection and onboarding decisions that shape how the widget feels in production.
What if my app already uses a wallet provider?+
Keep the widget inside that same provider model where possible. If you need a wallet-aware React stack, review the Dynamic Wagmi Connector Setup Guide alongside the widget docs.
Next steps
Move from a basic LiFi Widget embed into a wallet flow that matches the real product journey.
- Start with the LiFi Widget Integration Docs for the base embed.
- Use the LiFi Playground Guide to compare layouts and scope controls.
- Review the LiFi Widget component page for component context.
- If your app needs a unified wallet provider layer, continue to the Dynamic Wagmi Connector Setup Guide.
When the wallet step is clear, the widget starts feeling less like a generic embed and more like a product-native action surface.