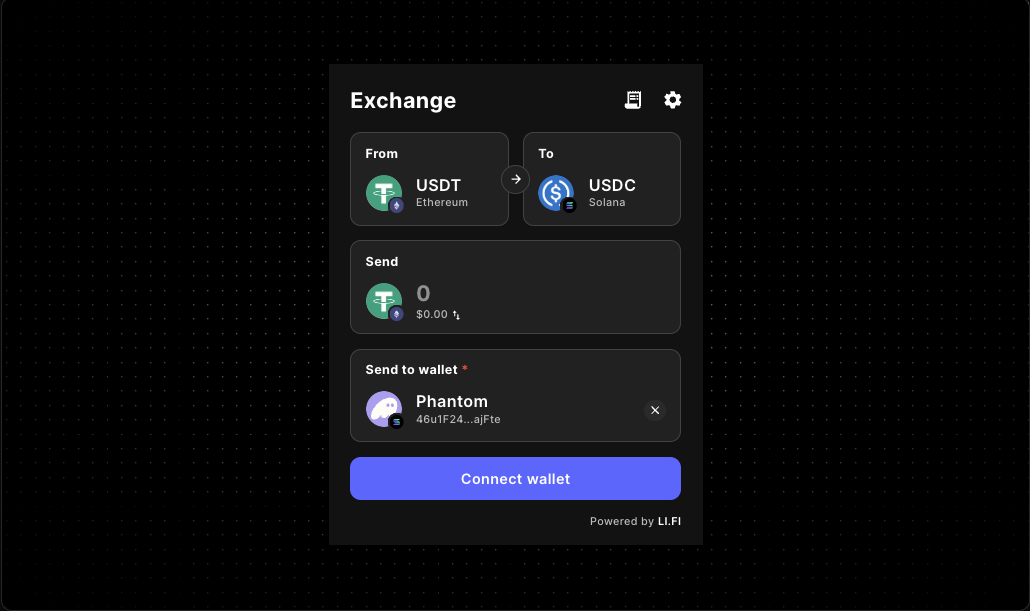
LI.FI Widget Embed Guide
Embed cross-chain swap and bridge flows in a Next.js or React product without turning asset movement into a separate project. This guide walks through where the Gizmolab LI.FI widget fits, how to embed it safely, and which configuration choices matter before you ship.
The existing LI.FI Widget component page captures evaluation intent. This docs route is the implementation layer for teams that need a clearer embed path, more grounded configuration guidance, and practical rollout advice.
Use this page when the widget should become a real product surface: onboarding that requires funds on a specific chain, a treasury action, a DeFi workflow, or an embedded utility panel inside a broader dashboard.
Why teams use a LI.FI widget
A crypto bridge widget is useful when users need to move assets before they can do the next thing in your product. Instead of sending them out to a separate tool, you can keep the transfer flow inside the interface they already trust.
- onboarding flows that require funds on a specific chain
- portfolio or treasury dashboards with built-in asset movement
- DeFi products that need a simpler cross-chain entry point
- embedded swap or bridge panels inside consumer or trading apps
The goal is not to expose every possible setting on day one. The goal is to make the transfer path understandable, reliable, and aligned with your app's rules.
What the Gizmolab LI.FI widget wrapper gives you
Reusable LiFiWidget component
Use one client-side component for app-level embedding in React or Next.js.
Layout options
Choose compact, wide, or drawer-style presentations depending on the page surface.
Appearance controls
Keep the embed aligned with light or dark UI modes used across your product.
Chain and token restrictions
Narrow the path when your product should support only certain routes or assets.
Theming hooks
Make the widget feel intentionally embedded instead of visually detached from the surrounding UI.
Optional fee configuration
Add monetization logic only when disclosure and support expectations are ready.
Recommended embed flow
1. Install the package
Start by adding the upstream widget package used by the Gizmolab wrapper:
2. Mount the widget in a client-rendered surface
Prove the widget works in the exact place where users will interact with it before you add restrictions or custom styling.
3. Decide whether the widget is a destination or a step
A dedicated swap page usually needs more surrounding context, room, and navigation support. A widget inside onboarding or a dashboard action usually benefits from tighter scope and fewer visible choices.
4. Add product rules after the base path works
Once the widget is rendering correctly, narrow the experience only where your product actually needs it.
- restrict chains
- restrict tokens
- set layout variants
- align appearance with the app theme
- review whether fee logic belongs in version one
That order matters. Teams that debug rendering, wallet behavior, branding, and route restrictions all at once usually slow themselves down.
Implementation details that matter early
Choose the right surface size
Use a compact layout when the widget supports another flow. Use a wider layout when swapping or bridging is the main job of the screen.
Keep the first version narrower than your technical maximum
If the product supports only a few routes or assets, configure the widget accordingly. Broad optionality can create extra decision points and more support burden than the product actually needs.
Treat monetization as a separate decision
The component supports fee configuration, but teams often benefit from validating the base transfer flow before adding fee presentation and support expectations.
Centralize shared configuration when multiple routes use the same widget
If the same LI.FI widget behavior appears across several surfaces, a shared config object makes updates easier to reason about.
Key configuration options to know
integrator
Identify the application or company tied to the integration.
variant and subvariant
Match the widget to the page surface, whether it is a compact card, a wider dedicated panel, or a drawer.
appearance
Keep the embedded widget visually aligned with the rest of your UI.
allowedChains
Use this when your product supports only certain chains and should not expose a broader route set.
allowedTokens
Use this when token availability should follow product policy instead of leaving every supported token visible.
theme
Use theming so the widget feels intentionally embedded instead of visually detached from the app.
fee and feeConfig
Use these only when fee behavior, disclosure, and support expectations are already defined.
transactionSettings and walletManagement
Use these when you need more opinionated defaults for transaction behavior or wallet handling.
Example: branded embed with tighter chain control
When swap or bridge activity is the primary task on the screen, a wider layout with brand styling and chain restrictions often gives users a clearer path.
Common pitfalls with LI.FI widget embeds
Trying to solve everything in one pass
Start with a minimal render, then add restrictions and styling. A smaller first milestone is easier to verify.
Giving users more choice than the product supports
If the surrounding product supports a narrow route or asset set, the widget should reflect that reality.
Treating a transfer widget like a generic card
A bridge or swap embed changes how users move value. It needs enough context around it to feel intentional and trustworthy.
Adding fee logic before the support model is clear
Fee configuration is easy to add technically. Explaining it well to users and handling related edge cases is the harder part.
Skipping real container testing
Validate the widget inside the actual layout where it will live, especially if the surface uses tabs, drawers, modals, or other constrained containers.
Production checklist
- install
@lifi/widget - mount the Gizmolab
LiFiWidgetin a client-rendered surface - pass an
integratorvalue - choose a layout with
variant,subvariant, andappearance - restrict chains or tokens only when product rules require it
- validate the widget in the final page container, not just an isolated test page
- review fee presentation before enabling
feeorfeeConfig
FAQ
Do I need to build swap and bridge flows from scratch?
No. The LI.FI widget gives you a ready-made UI surface for cross-chain swaps and bridging that you can embed and then adapt with configuration.
Can I use the widget in a Next.js app?
Yes. The current Gizmolab docs and component examples position the widget for Next.js and React integration, with the embed mounted in a client-rendered surface.
Can I brand the widget to match my app?
Yes. The Gizmolab wrapper supports theming, appearance choices, and layout options so the widget can feel more native inside your interface.
Can I limit what users can do?
Yes. You can narrow the experience with settings such as allowedChains and allowedTokens when your product should guide users through a more specific path.
Should I use individual props or a shared config object?
Use individual props when the embed is simple and local to one surface. Use a shared config object when several routes need the same widget defaults.
Keep exploring the docs
If you are actively evaluating a LI.FI widget embed, these are the next useful stops:
Move from evaluation to implementation
Start with a minimal embed, confirm the widget works in the real layout, and only then layer in branding, route restrictions, token restrictions, or fee logic. That gives your team a cleaner implementation path and a better chance of shipping an embedded transfer experience that feels native to the product.
"One of the only full-stack Web3 component libraries i've seen in the space so far. Ten out of ten recommended. Saved me a ton of time. Can't wait to see what templates they release next."
Samy
Side projects builder