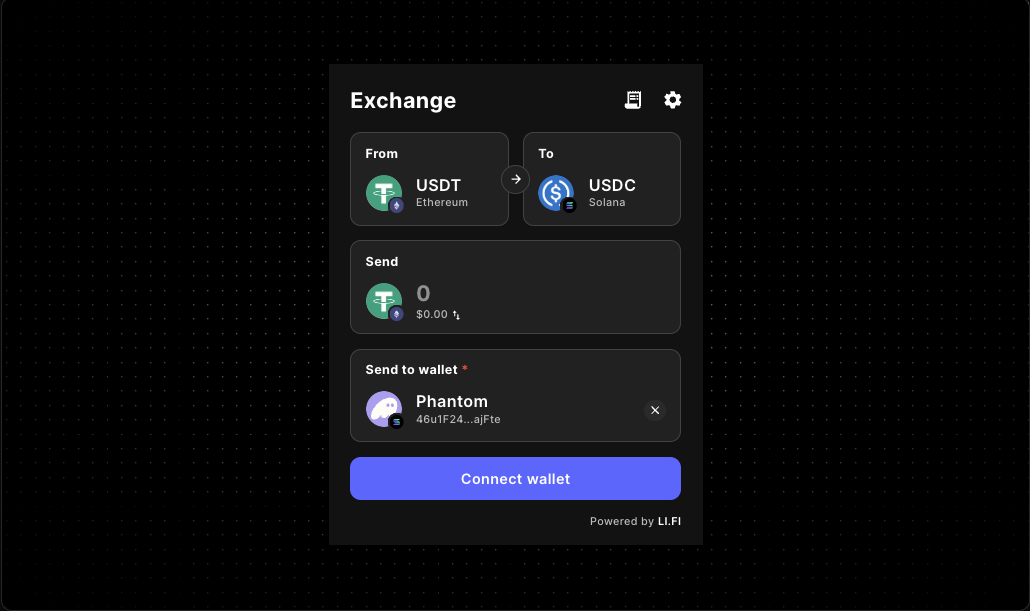
LI.FI Widget Embedded Wallet Onboarding Guide
Add cross-chain onboarding to your app without pushing users into a separate destination. The Gizmolab LI.FI Widget gives teams a faster way to embed swap and bridge flows inside React or Next.js products, while embedded wallet onboarding keeps the first transfer step close to the rest of the product journey.
This guide is for teams deciding how wallet connection should work before, during, or after the widget appears. It covers where the LI.FI Widget fits, how to keep onboarding scope tight, and which implementation choices usually matter first.
Why embedded wallet onboarding changes the widget decision
A LI.FI Widget embed can be technically correct and still feel awkward in production if wallet connection is treated as a separate concern. In most onboarding flows, the first point of friction shows up before the user ever chooses a route.
- users do not know whether they should connect a wallet before opening the widget
- the app exposes more chains or tokens than the onboarding flow actually supports
- the widget sits inside a modal, drawer, or panel that hides the next step
- wallet state is handled in one part of the app but assumed somewhere else
- fees, route restrictions, theme changes, and wallet handling are all introduced at the same time
When the widget is part of onboarding, the goal is usually not to expose every possible route. The goal is to help users move assets through a controlled first transaction, then continue with the rest of the product.
Where the LI.FI Widget fits in embedded onboarding flows
The Gizmolab LI.FI Widget wraps @lifi/widget into a reusable React component for cross-chain swaps and bridging. That makes it useful when users need to move value inside the app instead of leaving for another tool.
Strong fit for
- onboarding flows that require assets on a supported chain before users can continue
- deposit or treasury journeys that need a built-in transfer step
- wallet-aware dashboards with an embedded swap or bridge action
- consumer or DeFi apps that want a tighter cross-chain entry point
Review before launch if you have not decided
- which chains should be supported in version one
- whether wallet connection belongs at app level or widget level
- whether the transfer flow is a destination page or one step in a guided sequence
- what should happen immediately after the first successful transaction
The onboarding decisions to make before you style the widget
Decide whether the wallet connects before or during widget interaction
If your app already has a wallet-aware shell, connecting before users reach the widget usually creates a cleaner experience. For dedicated swap or bridge routes, widget-first interaction can also work when the page intent is obvious.
Decide whether onboarding should be broad or tightly scoped
A broad widget configuration can be useful for exploration, but onboarding flows usually benefit from narrower choices. If the product only supports a few chains, approved tokens, or a specific migration path, the widget should reflect that.
Decide whether the widget is a destination or a step
A destination page usually needs a wider layout and more surrounding context. A widget inside onboarding usually needs fewer visible choices, clearer supporting copy, and a more controlled next step.
Decide whether fees belong in version one
The widget supports fee configuration, but many teams are better served by validating the base route, wallet connection path, and support expectations before adding monetization logic.
Recommended embedded wallet onboarding patterns
App-level wallet connection before the widget loads
Best for
- dashboards
- wallet-aware apps
- treasury flows
- products with an existing provider stack
Why it works
- users connect once and stay in one consistent product state
- surrounding wallet-aware components can share the same context
- the widget feels like part of the app instead of a separate tool
What to review
- direct-entry routes where users arrive without a connected wallet
- reconnect behavior after refresh or expired sessions
- chain switching inside the real page container
Widget-first connection on a dedicated transfer page
Best for
- dedicated swap pages
- bridge routes
- evaluation flows where the widget is the main task
Why it works
- the page intent is obvious
- wallet connection is tied directly to the transfer action
- the widget can use a wider and more prominent layout
What to review
- disconnected and loading states on small screens
- whether the page exposes more route choice than the product supports
- whether the pre-connect copy stays short and task-focused
Guided onboarding with a narrowed widget configuration
Best for
- first deposit flows
- chain migration steps
- feature unlock paths
- guided transfer onboarding
Why it works
- the widget acts as an operational step instead of an open-ended exploration tool
- route scope stays aligned with the product promise
- users are less likely to branch into unrelated flows
What to review
- whether allowedChains and allowedTokens match the exact onboarding path
- whether the next action after the transfer is explicit
- whether the surrounding copy explains why the route is intentionally narrow
A practical setup path for React and Next.js teams
1. Install the widget package
2. Prove the base embed works in the real container
Start with the simplest possible client-rendered mount. Confirm the widget renders correctly in the exact page, drawer, or panel where users will interact with it before adding wallet-specific rules.
3. Add route scope after the first render is stable
Once the base embed works, tighten the experience only where product rules require it. That is usually the point where teams decide whether onboarding should stay narrow around selected chains or assets.
4. Centralize shared defaults when more than one route uses the widget
If onboarding, deposits, and standalone transfer pages all share the same baseline behavior, move common settings into one configuration object. That makes wallet-aware defaults easier to review and update.
Configuration choices that matter early
integrator
Use a clear integrator value so the widget is tied to the correct application context.
variant and subvariant
Match the layout to the job of the page. Compact layouts usually work better for guided steps, while wide layouts are often better for destination transfer pages.
appearance and theme
Keep the widget visually aligned with the surrounding UI so wallet onboarding feels like one flow instead of a detached card.
allowedChains and allowedTokens
Use these when onboarding should support a specific route set rather than a broader cross-chain experience.
walletManagement
Reach for this when the integration needs more opinionated wallet behavior than a basic embed.
fee and feeConfig
Treat fee settings as a separate implementation decision after the base onboarding path is stable and support expectations are understood.
Production checks before rollout
- install @lifi/widget
- mount the Gizmolab LiFiWidget in a client-rendered surface
- pass an integrator value
- validate the widget inside the final page container, not only an isolated test page
- test fresh-session, reconnect, and refresh states
- confirm direct entry into the route does not assume an already connected wallet
- restrict chains or tokens only when the product requires it
- make the post-transfer next step explicit
- review fee presentation before enabling fee or feeConfig
Common mistakes in embedded wallet onboarding
Treating wallet connection as separate from widget implementation
If the LI.FI Widget is one of the main transaction surfaces, wallet connection belongs in the same implementation review rather than being left for later.
Testing only in a blank page
A widget that looks correct in isolation can behave differently inside tabs, drawers, dense dashboards, or constrained mobile layouts.
Leaving the widget too broad for the actual use case
If the product supports a narrow route or asset set, reflect that in the widget configuration. Broader optionality is not always better onboarding.
Adding branding, route restrictions, and fee logic in one pass
The faster path is usually to prove the render first, then shape wallet UX, then add stricter product rules.
FAQ
Do I need to build swap and bridge logic from scratch?
No. The LI.FI Widget gives teams a ready-made UI surface for cross-chain swaps and bridging that can be embedded and then adapted with product-level configuration.
Should users connect their wallet before opening the widget?
It depends on the page. Apps with an existing wallet-aware shell often benefit from app-level connection first, while dedicated transfer pages can support widget-first interaction.
Can I limit which chains or tokens appear during onboarding?
Yes. The current LI.FI Widget examples and docs expose scope controls such as allowedChains and allowedTokens for narrower route experiences.
When should I use a shared WidgetConfig object?
Use it when several routes need the same widget defaults or when you want one place to review onboarding-related configuration.
Should I add fees in the first release?
Usually not. Many teams are better served by validating route clarity, wallet connection, and support burden before layering in fee logic.
Keep moving through the docs
Explore the LI.FI Widget componentRead the LI.FI Widget integration docsReview the LI.FI Widget wallet connect guideStudy the LI.FI Widget embed guideStart with the broader docs introductionMove from onboarding concept to implementation
Start with a minimal embed, verify the widget inside the real onboarding container, and narrow the route only where the product needs it. Once the wallet connection path is clear, the LI.FI Widget becomes easier to ship as part of a guided cross-chain experience instead of a separate transfer utility.
"One of the only full-stack Web3 component libraries i've seen in the space so far. Ten out of ten recommended. Saved me a ton of time. Can't wait to see what templates they release next."
Samy
Side projects builder